Add Data Source #
Learn how to add or connect your data source to Dave. Currently, Dave has already supported connections to Oracle, MySQL, PostgreSQL, SQLServer, MongoDB, Elasticsearch, and CSV.
Connect RDBMS Data Source #
- Locate the Data Source panel and click the
button.
- On the data source options, select your source and click Next.
- For RDBMS data source, enter any name for the data source name, after that, enter the correct information of the RDBMS data source you want to connect.
- 4. Click
Done to get directed to the workspace. The system will notify that your data source has been added to the workspace.
- 5. To find your data, locate your data under the Data Source panel.
Connect NoSQL Databases on Data Source #
Prerequisites:
Ensure the credentials are ready, including the connection’s host, port, username, and password for authentication.
- Add the connection to the data source, by locate the + button on Data Source panel.
- On the option, find NoSQL options and click the MongoDB or Elasticsearch.
3. Fill in the required fields and credentials to test and establish connections.
4. For MongoDB: select the MongoDB connection type based on the version used: Manual [MongoDB / MongoDBsrv] or Advanced.
5. Provide authentication details using MongoDB’s username and password.
6. Click the Test Connection.
7. After the connection succeeded, click OK, then you can find the data under the Data Source Panel.
8. If the connection failed, make sure the credentials are correct, and try to re-connect.
Connect File Data Source #
- Locate the Data Source panel and click the
button.
- On the data source options, select your source and click Next.
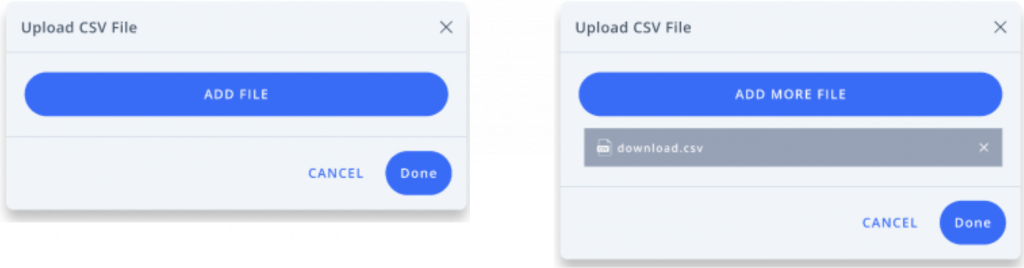
- Select local file on your device.
- 4.
- Click
Done
- to get directed to the workspace. The system will notify that your data source has been added to the workspace.
- 5. To find your data, locate your data under the Data Source panel.
Asynchronous Connection #
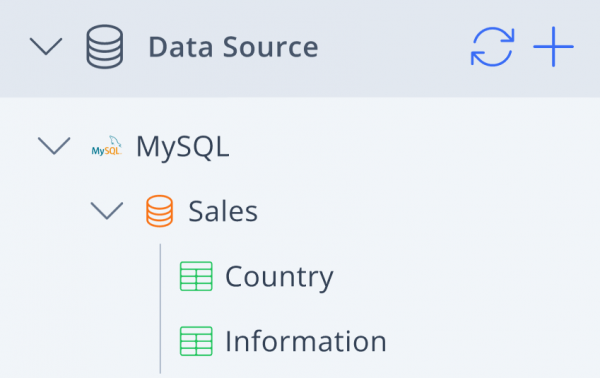
An asynchronous connection allows tasks or processes to run independently without waiting for immediate responses. Once the data source connection is successful, the system displays data from the source with the following icon as below.
Remove Data Source #
- Locate the data source that you want to delete under the Data Source panel.
- Click
on the selected data source then click Remove Data Source.
If the data source has a virtual table that is connected to the virtual data, you need to delete the virtual table from the virtual data.